Sunday, November 4, 2012

Well...this sounds like a wonderful idea!

It is one of those lazy Sunday afternoons.  I don't even want to turn on the television as I don't want to disturb the quiet.  I came home from church, put on my snuggliest relaxing clothes and decided to read. Before I grabbed my book I thought I would take a lap around Pinterest as I am really getting in the mood this year to decorate the house from the top to the bottom for Christmas.  Right as I was ready to shut my computer I saw this recipe:


Now how can any recipe that has Snickers in the ingredients be a bad idea?  Really? 


Apples are one of the best things about fall and Apples and Snickers are a great idea!  
Here is the recipe:


INGREDIENTS

Print This Recipe Print This Recipe

INSTRUCTIONS

  1. Whisk vanilla pudding packet, 1/2 cup milk and cool whip together until well combined.
  2. Chop up apples and Snickers.
  3. Stir chopped apples and Snickers into pudding mixture.
  4. Place in a large bowl and drizzle with caramel ice cream topping.
  5. Chill for at least 1 hour before serving.
Enjoy!

Here is a link to the webpage that I found this on:
http://www.chef-in-training.com/2012/09/snickers-caramel-apple-salad/

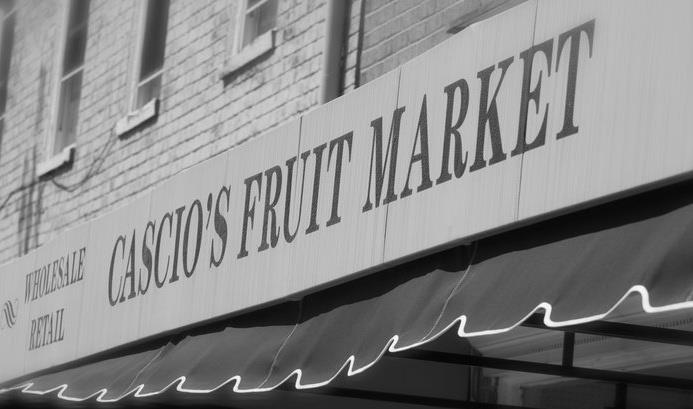
There are other recipes that look yummy too.  Stop by Cascio's Fruit Market for your apples and enjoy this yummy recipe!


Wednesday, October 31, 2012

Hurricane Sandy ....really....

(Taken Monday night about 9:30 p.m.)

As I type this it is Wednesday evening of what has been a long week....yeah, we are only half way there.  Hurricane Sandy blew into town on Monday with a vengeance, but admit it, when you think of a hurricane you don't think of SNOW!  

That is exactly what we got and it just keeps coming.


As you can see, some like it better then others.

I was out and about in Somerset County today and took some snow pictures for those of you who don't live in Somerset any longer, here is a taste of what you are missing.


After a very cold and wet trek through the hills of Somerset County we came home to a Cascio's dinner of Mahi Mahi, fresh squash and Delicious Rice.  I will share the simple rice recipe here. Enjoy!

DELICIOUS RICE DISH

1 cup  White Rice (you can substitue brown if you prefer, but this is better with white)
1/2 tsp of minced garlic
Fresh parsley minced very fine
salt & pepper to taste
Olive Oil
2 cups of Chicken Broth

Cover bottom of a pan with olive oil. Add 1 cup of rice and fry until just beginning to brown in olive oil. Add Chicken Broth and seasoning. Bring rice to boil and turn down to simmer and cover. I cooked this for 20 minutes and it was perfect. This is a wonderful side dish to almost any dinner.

Enjoy!!


Saturday, October 6, 2012

Perfect Crab Cakes....enjoy!


Perfect Crab Cakes

I have been using this crab cake recipe since it ran in the USA Weekend Magazine in 2005. It is always perfect and the crab cakes couldn't be easier.  We stock lump crab meat in the store that I NEVER have to pick through.  It is literally perfect.  When I see the cost of crab cakes in a restaurant I always shudder, because I know I can make perfect crab cakes at  home.  
ENJOY!


Perfect Crab Cakes

1 egg beaten
2 TBS. Mayonnaise
2 TBS. Minced green onion tops
1/4 tsp. (I like a bit more) Old Bay Seasoning
1 lb. Lump Crabmeat drained (get this at Cascio's Fruit Market)
4 tsp. milk
10 Saltine Crackers finely crushed
6 TBS. Olive Oil for frying
Fresh Lemon Wedges for serving

Mix egg, mayo, green onion tops, and Old Bay in a small bowl until mayo is completely mixed in, then set aside.

Lightly break up crabmeat in a medium bowl.  Add milk, toss gently to coat.  Add crushed saltines, toss gently to combine.  Add egg mixture gently toss, once again to combine.

Using a 1/3 - cup measuring cup, scoop up a portion of crab, forming the mixture into a very compact cake.  Repeat to make 8 cakes (can be covered with plastic and refrigerated up to 8 hours ahead).

About 10 minutes before serving heat oil in 12-inch skillet over medium to medium-high heat. Carefully add crab cakes, saute, turning once until golden brown, about 3 minutes per side.  Transfer to a paper towel-lined plate.  Serve immediately with lemon wedges. 

This recipe is a never fail and delicious!  

Tuesday, October 2, 2012

Ahhh....Autumn in Somerset County


This past Saturday morning I as up out of bed before even a sliver of light was peeking through.  I had a date with some of my friends from the photography club to be standing in Kooser when the sun came up.  


It was one of those perfect photography blessed mornings.  A good bit of fog and the trees here in Somerset County are just about to hit their peek.


By the time the time the fog had all burned away in Kooser we decided that even though we were wet, muddy and cold  (with extremely wet feet!) we would hit the Bakersville/Edie road and see what the fall colors looked like as we followed that age old Somerset County wisdom of "All roads lead to Edie." 


But first we back tracked just a bit and grab this shot of the gazebo at the Glades Pike Winery.


We stopped along the road and captured this pretty pond with the fog still hanging right over the water.  


These next few shots were taken at beautiful Laurel Vista Farms.


And then as we left we happened to see these guys just hanging out watching us.


All in all, it was a perfect Saturday morning.  Which ended with all of us hunkered together in a local restaurant eating a hot breakfast and warming up with a cup of coffee.  If you have not taken a trip to Somerset County lately, don't delay.  The trees are beautiful and the weather has been very nice.  Oh and plan on a quick trip to Cascio's!  We would love to see you!


Tuesday, September 25, 2012

A bit behind....but I got a great excuse!


I realized as of today I have been totally neglecting my blog.  I have a good excuse, really I do.  
You see this was probably the busiest most wonderful summer I can remember for a very long time.  Because our oldest son Spencer married the love of his life.

Here is where I will share a picture taken of Spencer when he was about six years old.


That is Spencer on the tricycle with his brother Stuart in the wagon and our dog Scarlett.  I know the quality of this picture is not great but I feel this picture captures the essence of how our lives were around this time.  Typical boy stuff.  Spencer would drive his brother and Scarlett around and around and that dog never jumped out of that wagon.  I can still see it as if I were looking out my kitchen window.

Then he brought home this girl....and she stayed and stayed and stayed.  Soph-seniors, proms, youth group and off to college at Grove City....she stayed.  She stayed through thick and thin.  She supported him and loved him and....well she was "the one."  

Engaged last August


(They allowed me the honor of taking their engagement shots!)

They began immediately planning the wedding!

The date was set for August 4th, 2012.  The guest list was huge!  We all sweated that a bit (okay more than a bit, but that is what you get when you combine two big families who have lived in one town their entire lives.) The party part was shaping up to be a ton of fun and the ceremony was lovely and meaningful with God at the center of their lives and in their commitment.  


A little lighter moment!


So happy!


Don't those smiles say it all?


God Bless You
 Jennifer and Spencer Brougher


See why I didn't have time to write a blog?  I promise to do better....honestly I will.


(photo credit for wedding shots to Jenn's friend Alex Moore. Amazing Photographer)

Extra note:  Spencer is the Youth Director at St. Paul's Presbyterian Church and Jenn is a biology teacher. (okay they both almost are)....they have a to finish a few details at Grove City and then they are home, home home and ready to start their jobs.

Wednesday, July 18, 2012

A Southern Staple...Sweet Freedom; Living Allergen Free


Grits, a southern staple.  Severed at breakfast, lunch and dinner, three-quarters of the grits sold in the United States are from a belt of coastal states stretching from Louisiana to the Carolinas, known as the "Grits Belt.". Here in the northeast, reactions to this interesting side dish are mixed.  If you're not familiar, grits is coarsely ground corn that is usually cooked with milk and butter. 
I've always been a fan of this somewhat bland side dish, so recently began experimenting with ways to make tasty dairy free versions.   Grits made with just water miss the mark by a mile.  If you're going to try grits, it's worth it to add the extra calories  by using dairy free "milks" and "creams".  Almond Breeze makes an almond milk, coconut milk blend that I like to use in recipes that call for whole milk.  For recipes calling for heavy creme, my go to is Mimic Creme.  It is a blend of almond and cashew creme that's both gluten and dairy free.  I use the soy free version of Earth Balance for a butter substitute in all recipes.  It has a great flavor and replaces butter one for one. 
Although I love plain grits my preference is for a slightly spicier version.  My all time favorite grit dish is Shrimp and Grits!  I love both the traditional southern recipe and a "cream cheese" version that adds a unique flavor.  The southern version adds onion and bacon along with the ubiquitous hot sauce. 
If you've tried grits and decided they weren't for you, give them one more shot and try one or both of these recipes for Shrimp and Grits.  I promise you won't be sorry!


Cream Cheese Shrimp & Grits!

Serves 6

2 cups Mimic Creme
2 cups Almond Breeze almond/coconut blend
1 cup stone-ground grits (I use Bob's Red Mill)
1/3 cup cashew cream cheese
kosher salt and freshly ground black pepper to taste
In a medium saucepan, bring cream and milk to a simmer over moderately low heat.  Whisk in grits and cook, stirring often, for 25 minutes.  Stir in cheese and season with salt and pepper.
Toss shrimp in olive oil and hot sauce to taste (can be omitted) and bake shrimp in 450 degree oven for 10 to 12 minutes.

Traditional Shrimp and Grits

Ingredients
1 tablespoon butter replacement
1 tablespoon olive oil
1 large onion, finely diced
2 cloves garlic, finely chopped
2 cups milk replacement
3 cups water
1 cup grits
1 1/2 cups cheddar cheese replacement finely grated
8 ounces turkey bacon, chopped
20 medium to large shrimp, peeled and deveined
1/4 cup scallion, chopped
Salt and pepper
Procedures

Add the butter replacement and olive oil to a saucepan set over medium heat. When the butter has melted, add the onion and cook until soft. Add the garlic and cook for another minute. Turn the heat to high and pour in the milk replacement and water. Bring to a boil and slowly whisk in the grits. Turn the heat to medium-low and cook, stirring occasionally, for 15 to 20 minutes. When done, dump in the cheese replacement and stir until it is melted. Season with salt and pepper and set aside.

Add the bacon to a large skillet set over medium-high heat. Cook until golden browned and crisp. Remove and drain on paper towels. Pour out all but 3 tablespoons of the oil.

Set the skillet back over medium-high heat and when nearly smoking, add the shrimp. Cook until pink, about 1 1/2 minutes per side.

Scoop some of the cheese grits into a bowl and top with the shrimp, chopped bacon, and scallions. Season to taste with salt and pepper 

Thursday, July 12, 2012

A Cake For Angels. Sweet Freedom; Eating Allergen Free

Wow I have not updated this blog since June 14th!  Sorry about that!  Both Dawn and I are slipping, mostly me!  Here is the latest addition to her Sweet Freedom series!  


A Cake Fit For Angels

Did you ever wonder how Angel Food cake got its name?  Although there is no official documentation, it's believed that the Pennsylvania Dutch were the original makers and namers of the cake.  The cake was presumably named because it is light and airy enough to be food fit for angels.
Angel Food Cake is made with a large quantity of egg whites and no shortening or leavening.  A fun and colorful way to serve this cake is to break it into pieces and layer in a large glass bowl with different fruits, berries and cool whip.
A gluten free version of this cake can be made easily by choosing lighter gluten free flours like sweet rice or tapioca. 
Although I like Angel Food Cake, my personal favorite is Yellow Angel Food Cake.  I used to beg my grandmother to make it for me when I was a little girl.  It's a denser cake than the traditional white Angel Food Cake and is usually topped with a sea foam icing. 
Both cakes are great for those of us who are dairy free as there is no milk or butter in these recipes.  I've included a typical recipe for Angel Food Cake and my grandmother's recipe for Yellow Angel Food Cake.  Enjoy!


Angel Food Cake

Ingredients
1 cup gluten free flour
3/4 cup sugar
2 tablespoons sugar
12 large egg whites, MUST be room temperature
1 1/2 teaspoons cream of tartar
1/4 teaspoon salt
3/4 cup sugar
1 1/2 teaspoons vanilla
1/2 teaspoon almond extract

Directions
Note: For those not used to making angel food cakes Don't get any yoke in the whites, if you do throw out and start over. I always separate the egg in a glass first. Then if no yoke pour into measuring container.
DO NOT GREASE PAN.
Heat oven to 375°.
Sift the cake flour and 3/4 cup + 2 Tbsp sugar; set aside.
Combine the extracts in a small bowl; set aside.
Beat egg whites, cream of tartar and salt until it forms peaks.
Add the other 3/4 cup of sugar slowly, then beat on high until stiff peaks form.
If you have a mixing guard for your mixer bowl now would be a good time to attach it.
Beating on LOW, add flour mixture and extracts slowly.
Make sure you fold in the sides and bottom of your mixing bowl.
(You can fold in flour mixture by hand but this way is faster.) Spoon into an angel food cake pan.
Move a knife through batter to remove air pockets.
Bake 30-35 minutes or until top springs back when touched lightly with finger.
Invert pan onto a tin funnel to cool completely.


Yellow Angel Food Cake

6 eggs
1 ½  cups sugar
¼ tsp almond
1/4 tsp salt
¾ tsp cream of tarter
½ cup cold water
½ tsp vanilla
1 ½  cups of gluten free flour

Beat egg yolks, salt and water.  Add sugar slowly.  Beat until thick and light.  Add flavorings.  Fold in flour by hand, then the beaten egg whites. (Do not beat this mixture)  Bake 350 for I hour.

Sea foam Icing

Ingredients
2 egg whites, unbeaten
1 1/2 cups brown sugar
5 tablespoons ice water
1/8 teaspoon salt
1 1/2 teaspoons dark corn syrup
1/8 teaspoon cream of tartar
1 teaspoon vanilla
Directions
Put first six ingredients in top of double boiler and place over boiling water.
Beat on low speed until ingredients are thoroughly mixed. Cook on medium heat. Cook beating constantly on high speed until icing stands by itself.(about 5 min.) Remove from heat. Add 1 teas. vanilla. Beat for 1 more minute.

Thursday, June 14, 2012

Biscotti Heaven - Sweet Freedom; Living Allergen Free


Confession:  As I am posting this blog I am actually eating one of Dawn's biscotti.  I am totally not kidding and they are delicious.  My favorite part is she didn't bake them until they were really hard.  I think they are perfect!  Try this recipe, I can't give it any higher recommendation.


If you've ever been to the strip district in Pittsburgh, I hope you've had the guilty pleasure of sampling the treats at Enrico Biscotti Co.  Their claim to fame is, of course, biscotti but the choices don't stop there.  Until recently, my personal favorite was the gluten free macaroons.  When paying for my goodies one afternoon, I mentioned to the clerk that I wished they would make gluten free biscotti.  She smiled and pointed to two jars almost hidden at the back of the counter.  Both were overflowing with, yes you guessed it, gluten free biscotti!  I added several to my bag and happily munched my way out of the door.  Not to sweet, crunchy, endless flavor combinations; I was in love!  And on a mission....to create my own versions at home.  After searching the Internet for ideas and my cupboards for ingredients, I came up with two delicious recipes.  They're simple to make and get the crunchy texture by a process of double baking.   You can even make a chewy rather than crunchy version by reducing the the amount of time during the second baking.  Try the two recipes below or add in your own favorite nuts, fruits and flavorings.  Enjoy!


Nutty Piña Colada Biscotti

INGREDIENTS:
4 1/4 cups gluten free flour
1 teaspoon baking powder
1/2 teaspoon salt
1 cup butter alternative, softened
1 1/2 cups white sugar
3 eggs
2 tablespoons rum
2 tablespoons pineapple juice
1 1/2 teaspoons coconut extract
1 cup shelled pistachio nuts
1/2 cup crushed pineapple (drained)
1/2 cup sweetened flaked coconut

DIRECTIONS:
1.            In a large bowl, cream together the butter alternative and 1 1/3 cups of sugar until light and fluffy. Beat in the eggs one at a time, mixing well after each one. Stir in the rum, pineapple juice and coconut extract until well blended. Combine the gf flour, baking powder and salt; stir into the batter. Stir in the pistachio nuts, pineapple and coconut until evenly distributed. Cover and refrigerate for about 10 minutes.
2.            Preheat the oven to 350 degrees F (175 degrees C). Lightly grease two cookie sheets.
3.            Divide the dough into four equal parts. Form each piece of dough into a 12 inch long log shape on a lightly floured surface. Place two logs onto each cookie sheet, and pat down until they are about 3 inches wide. There should be at least 2 inches of space between each log.
4.            Bake for 30 minutes in the preheated oven, until firm but not crisp. Remove from the oven, and allow to cool for at least 10 minutes.
5.            Place the biscotti bars on a cutting board, and use a serrated knife to cut into 3/4 inch wide diagonal slices. Return the slices to the baking sheets cut side down. Return to the oven. Bake for 8 minutes, then turn the cookies over, and bake for an additional 8 minutes, or until lightly toasted. Cool completely, then store in an airtight container.

Spring Biscotti

INGREDIENTS:
1/4 cup butter alternative
3/4 cup white sugar
1 tablespoon orange zest
1/2 teaspoon vanilla extract
2 eggs
1 egg white
2 cups gluten free flour
1 1/2 teaspoons baking powder
1/4 teaspoon salt
2 ounces dairy and gluten free chocolate chips
1/2 cup dried cranberries
1 1/4 cups pistachio nuts

DIRECTIONS:
1.            In a large bowl, cream together butter alternative, sugar, orange zest, and vanilla with an electric mixer until light and fluffy. Mix in eggs and egg white one at a time, beating well after each addition. Sift together the gf flour, baking powder, and salt; gradually blend into the creamed mixture using a wooden spoon. Stir in the chocolate chips, dried cranberries, and pistachios. Cover, and chill for 30 minutes, or until dough is no longer sticky.
2.            Preheat oven to 325 degrees F (165 degrees C). Line a baking sheet with parchment paper.
3.            Turn dough out on a lightly floured surface, and divide into halves. Form each half into a flattish log about 12 inches long by 3 inches wide. Arrange logs at least 3 inches apart on baking sheet.
4.            Bake for 30 minutes in preheated oven, or until pale gold. Allow logs to cool on the baking sheet until cool enough to handle. On a cutting board, cut logs crosswise on a diagonal into 1 inch thick slices. Arrange on baking sheet.
5.            Bake for an additional 15 minutes, or until golden. Transfer biscotti to wire racks, and cool completely. Store in an airtight container at room temperature.

Thursday, June 7, 2012

Summertime Sipping - Sweet Freedom; Living Allergen Free


Summer is finally here!  Maybe not the actual date on the calendar but for me, the beginning of June has always been the official start of summer.  To me, summer means June bugs hitting the screen, bright red watermelon, sleeping with the windows open, butter (alternative!) dripping off fresh corn on the cob, and twinkling lightning bugs.  It's when my dogs want to be out more than in and so do I.  Summer is also the time of the year when I feel like a few more hours get added to my day.  I know it's only a trick I play on myself but the extra hours of daylight make me feel like I've won the time lottery.  One of my favorite ways to spend my "winnings" is hanging out with friends on the deck, sipping wine and watching the light slowly fade out of the day.  I love a crisp, dry white wine like Pino Grigio or Chardonnay.  Fruit filled sangria's have always been appealing but when I taste them I'm disappointed with how sweet they are.  I recently found a recipe for Strawberry Basil Sangria that uses a base of Chardonnay.  My interest was  piqued because of the white, dry base and the fresh basil, so I decided to give it a try.  Basil has always been one of my favorite herbs.  It has a unique flavor that pairs well with the strawberries and apple.  The great thing about this recipe is that you can make it as sweet or as tart as you like by increasing or decreasing the amount of sugar and grape juice.  It's a refreshing drink for a summer evening and keeps well in the fridge for a day or two (that's only if your lucky enough to have left overs!).  Of course this is both gluten and dairy free so what's not to enjoy!


Strawberry Basil Sangria

½ lb of fresh strawberries
1 apple
1 ounce of fresh whole basil leaves
1 bottle of your favorite Chardonnay
½ cup organic sugar
1 cup of club soda
1 cup of white grape juice

1. Trim and thinly slice the strawberries.

2. Slice and dice the apple into very small bits.

3. Score the basil leaves with a fork or cut into strips.  If you score the basil then simply  rub the basil leaves gently with the fork in order to release their flavor in the sangria.

4. Layer the fruit, sugar and basil in a large pitcher and let sit for about 10 minutes. This is just to let the sugar absorb the juices from the basil and the fruit. You'll see it turn a bit red.

Thursday, May 17, 2012

Healthy Decadence - Sweet Freedom; Eating Allergen Free


Editor Note:  I had the pleasure of eating these muffins a day ago and they were terrific.  I do not have food allergies and can basically eat what I want and I would grab one of these anytime!  Outstanding is the word to describe them.  
ENJOY!!


Healthy decadence; a contradiction of terms, an oxymoron, false advertising.
Normally I would agree with all of those definitions for "healthy decadence".  That changed for me after one bite of the recipe I'm sharing today.  I'm confident that after your first bite, you too will be convinced that those two words really do belong together! 

After popping the last Frozen Blueberry Muffin into the microwave to thaw, I went on a search for something a little different to start my day.  I ran across the recipe for Raspberry and Dark Chocolate Banana Muffins but initially passed it over because I'm not a big banana fan.  For me, bananas have to be on the green side of ripe or they belong in the trash!  However, the lure of justifiable chocolate before lunch eventually convinced me to give them a try. 

Both bananas and raspberries are full of benefits.  In fact, bananas have several positive benefits that many other fruits do not.  The health benefits of bananas far outweigh those of the apple because it has many more vitamins and nutrients than their round counterparts.  Bananas have two times as many carbohydrates as an apple, five times as much Vitamin A and iron and three times as much phosphorus. In addition, bananas are also rich in potassium and natural sugars.  All of these factors combined make the banana a super food that is an integral part of a healthy daily regimen.  Because of the abundance of vitamins and minerals, bananas are a great source of natural energy.  Eating only two bananas will give you enough energy to exercise or workout for an hour and a half.  Because they are rich in potassium, bananas help the bodys circulatory system deliver oxygen to the brain.  This also helps maintain a regular heartbeat and a proper balance of water in the body.  Potassium is also helpful for reducing strokes and regulating blood pressure because of the way it promotes circulatory health.

Raspberries are high in ellagic acid, a phenolic compound that may help prevent cancer, inhibit the growth of cancer cells and actually stop the growth of some cancers.
Raspberries also contain strong antioxidants such as Vitamin C, quercetin and gallic acid.  Its seed oil even has a natural sun protection factor!  One of my favorite benefits of raspberries is their ability to burn fat!  This fruit is packed with fiber and manganese. Fiber helps slow the digestive process so you feel full longer. Manganese is a trace mineral that helps keep your metabolic rate high, which in turn burns fat.

So....mash some bananas, stir in the raspberries, toss in a healthy cup of chocolate chips and enjoy!


Raspberry and Dark Chocolate Banana Muffins

Ingredients:

2 cups gluten free flour
3/4 teaspoon baking soda
1/2 teaspoon salt
1 cup granulated white sugar
4 tablespoons dairy free butter alternative, at room temperature
2 large eggs
1 1/2 cups mashed ripe banana (about 3 bananas)
1/3 cup dairy free yogurt or coconut milk (canned)
1 teaspoon vanilla extract
1 cup dark chocolate chunks or chips (I use Enjoy Life dairy free semi-sweet chocolate mini chips)
1 cup halved raspberries, tossed in 1 tablespoon all-purpose flour (I use frozen sweet cherries and raspberries)

directions:
1. Preheat oven to 350°F.  Line muffin tins with muffin foil or paper cups (18 cup)
2. In a medium bowl, whisk together the gluten free flour, baking soda and salt.
3. In a separate large bowl, beat the sugar and dairy free butter alternative with an electric mixer at medium speed until well blended (about 1 minute). Add the eggs one at a time, beating well after each addition. Add the banana, yogurt or coconut milk, and vanilla; beat until blended. Stir in the flour mixture; just until moist. Don't over-mix. Stir in the chocolate chunks and then gently stir in the raspberries. If you want, you can sprinkle a few additional chocolate chunks and raspberries on the top of each muffin to make them look pretty.
4. Spoon the batter into the prepared muffin tins. Bake for 30 minutes or until a wooden pick inserted in center comes out clean. Cool 15 minutes in the tins on a wire rack. Remove from tins and cool completely on the wire rack.

Friday, May 11, 2012

A treat for Mom - Sweet Freedom; Living Allergen Free


Just a quick personal note before you read Dawn's blog.  I recently had the pleasure of enjoying these Gluten Free Cream Puffs and they were outstanding.  So don't think, "oh gluten-free, not for me" because these are great for anyone!  Enjoy!


A Special Treat For Mom

Look no further if you're trying to find a special treat to make for Mom this year!  Impress her with your culinary skills by made a fresh batch of home made cream puffs.  They are deceptively simple to make but look and taste like you slaved over a hot stove for hours.      Cream puffs  an be filled with whipped cream, ice cream or my favorite - warm vanilla pudding.
Americans have an obsession with these light, tasty pastries.  They've been on American menus since 1851 and is the official dessert of Wisconsin.  Last year at the Wisconsin State Fair, David Schmidt and Team Cream Puff grabbed the world's record for the largest cream puff weighing in at 125.5 pounds!

I'm sharing a recipe that uses shortening instead of butter.  I've found that shortening will "stand-up" better in certain recipes instead of a dairy free butter alternative.  The puffs come out golden brown, soft and chewy.  Enjoy!


Gluten Free Cream Puffs

Ingredients

1 cup water
1/2 cup shortening
1/3 cup potato starch flour
2/3 cup rice flour
(or 1 cup gluten free flour mix of your choice)
1/2 teaspoon salt
1 tablespoon sugar
4 eggs

How to make it

Preheat oven to 450 degrees
Combine water and shortening in a large saucepan.
Bring to a rapid boil .
Mix flours, salt, and sugar and add to water and shortening. Stir until mixture forms a ball that leaves the sides of the pan.
Remove from heat and cool slightly.
Add the unbeaten eggs, one at a time, beating well with electric mixer after each egg is added.
Drop by tablespoons on to prepared baking sheet.
The puffs should be approximately 2 inches round and about 1/1/2 inches high.
Leave space for them to expand.
Bake in 450 degree oven for 20 minutes, then reduce heat to 350 degrees and bake for 20 minutes more.
Remove from oven and prick with knife to let steam escape.
Cool, cut off tops and scoop out any remaining moist dough before filling
Makes 8 to 10 puffs


For the Filling

2/3 cup dairy free "milk"
1/3 cup granulated sugar
3/4 cup heavy cream dairy alternative (Mimic Creme or canned coconut milk)
4 tablespoons cornstarch
1 large egg yolk
2 teaspoons vanilla extract

Prepare the Filling: Combine dairy free milk and sugar in a medium saucepan and cook over medium heat until mixture reaches a gentle boil. Reduce heat to low. Meanwhile, a small heatproof bowl, vigorously whisk together heavy cream dairy alternative, cornstarch, and egg yolk. In a slow and steady stream, whisk heavy cream mixture into hot milk. Increase heat to medium. Cook, whisking constantly until pudding thickens, about three minutes.